Making the Positive Cast

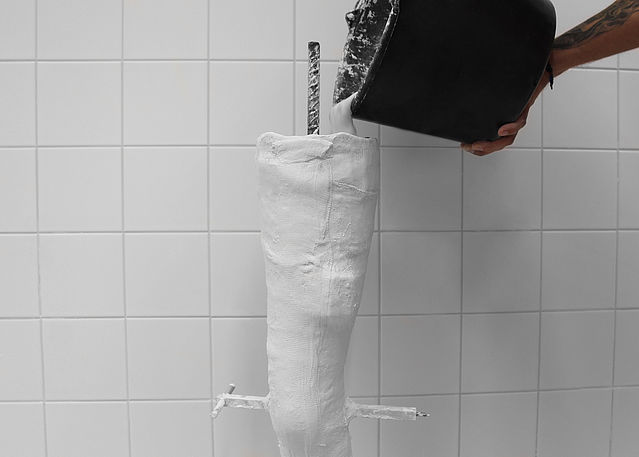
After making the negative cast, it is filled with plaster. However, the procedure is a little more complex from an orthopaedic point of view:

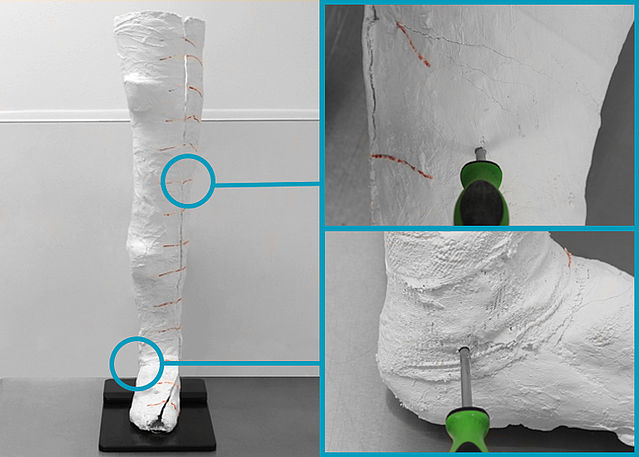
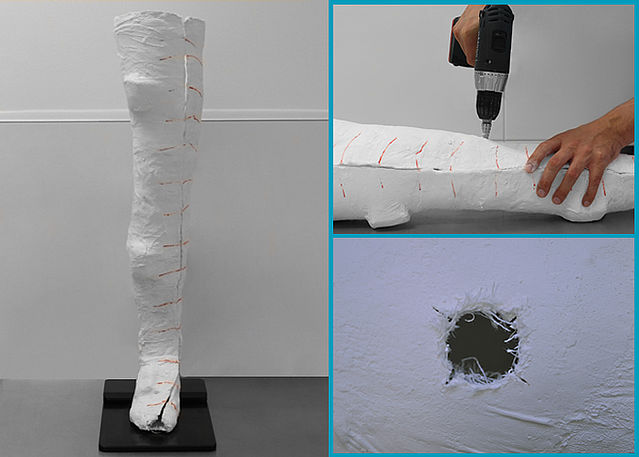
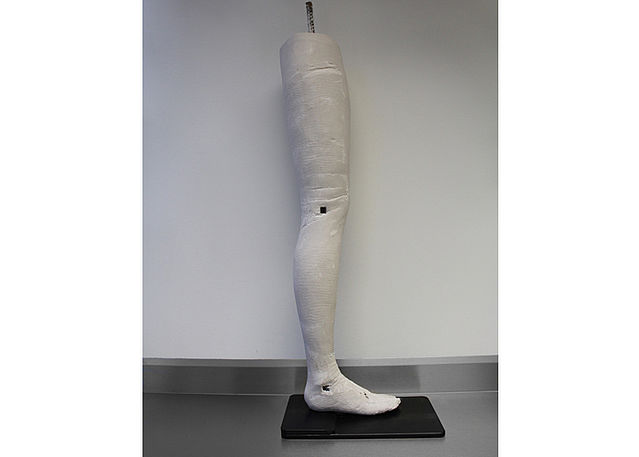
The calculated mechanical pivot point at knee height and the mechanical pivot point at ankle height are already marked while making the negative cast. The pivot points are transferred in two steps: from the leg to the negative cast model and from the negative cast model to the positive cast model.

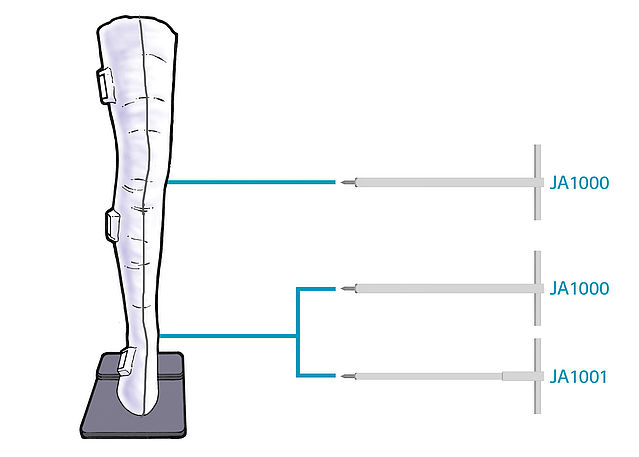
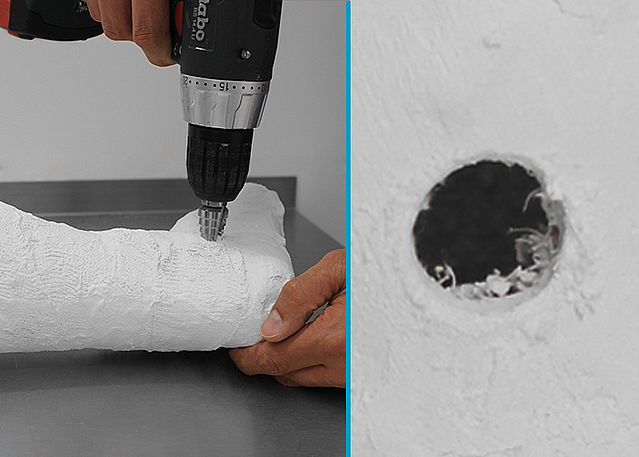
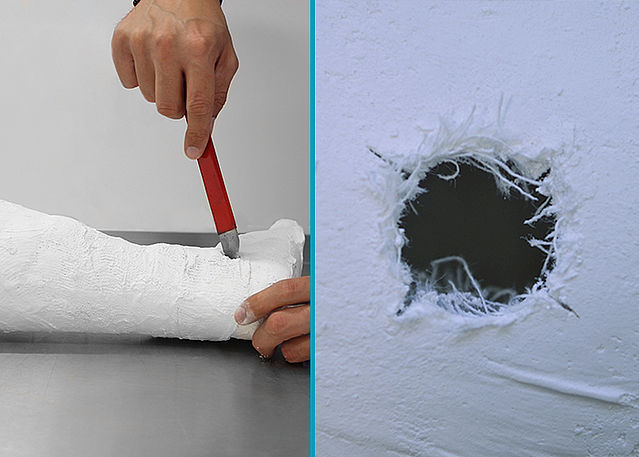
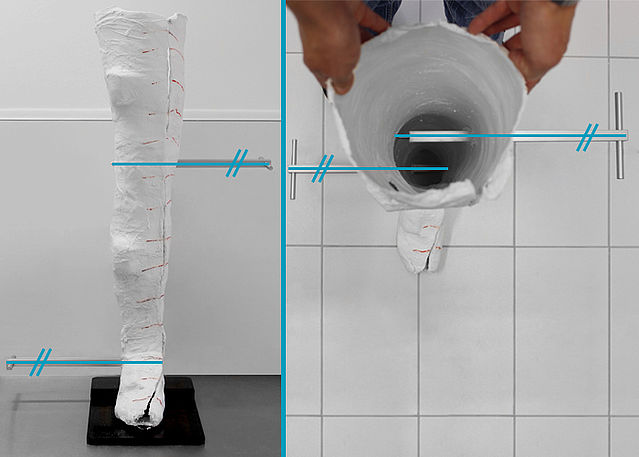
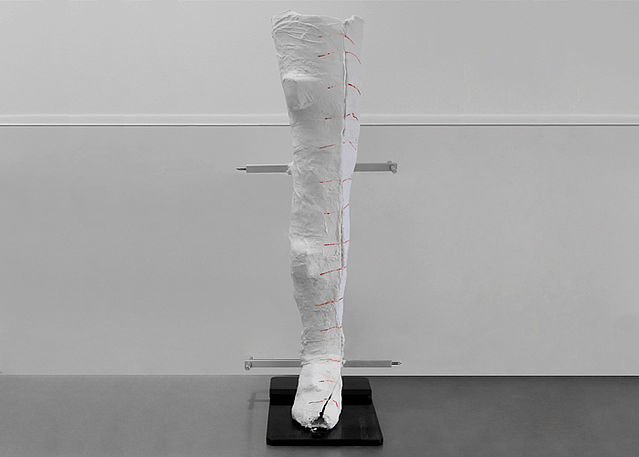
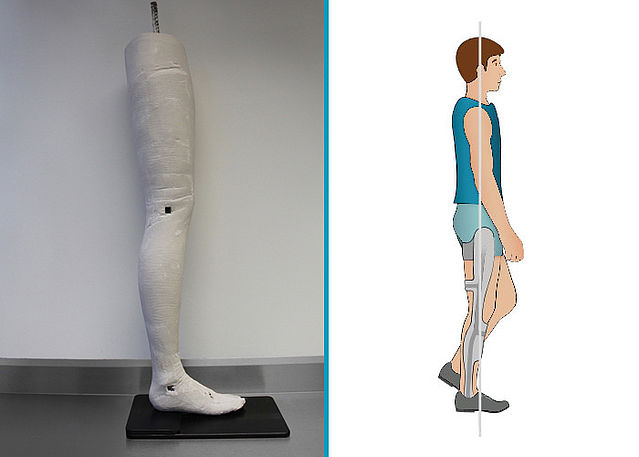
These markings help placing the alignment aids while making the positive cast. The alignment aids should be placed parallel to the ground and to each other and at an angle of 90 degrees to the direction of movement. They serve as placeholder for the holders of the system joints. The axis position of ankle and knee is the result of the medial and lateral pivot point. These will be the positions of the orthosis joints in the later course of the orthosis production.

Each step of the preparation already has an effect on the final orthosis. The more precisely the pivot points are transferred and the alignment aids are placed, the better the final result.

Fase 1/1

To make the positive cast, you need two alignment aids. Use alignment aids with a square of 11 x 11 mm for system ankle joints in system widths of 10 and 12 mm. Use alignment aids with a square of 15 x 15 mm for all other system joints. Clean both alignment aids before using them. In addition, you need an awl, a cordless drill, a step drill and a knife.

Fase 1/3

Prick a hole through the plastered washer at the lateral pivot point at ankle height using an awl. Repeat the procedure at the medial pivot point at knee height.
You can find the steps for positioning the washer under “2 – Preparing the cast”.

Fase 2/3

Use a step drill to enlarge the hole at the lateral pivot point at ankle height. Bear in mind that the diameter of the hole has to be smaller than the alignment aid’s width in order to ensure a fit that is free of play.
Repeat the procedure at the medial pivot point at knee height.

Fase 3/3

Cut the hole at the lateral pivot point at ankle height with a knife so the alignment aid can be guided through the plaster.
Repeat the procedure at the medial pivot point at knee height.

Fase 1/2

Define the alignment of the mechanical axes by pricking a small hole in the opposite plaster layer with the tip of the alignment aid at the medial pivot point at ankle height. Bear in mind that the alignment aids must be positioned at an angle of 90 degrees to the direction of movement and parallel to the ground and to each other. Repeat the procedure with the alignment aid at the lateral pivot point at knee height.

Fase 2/2

Prick the holes at the medial pivot point at ankle height and at the lateral pivot point at knee height with the help of the markings.

Fase 1/3

Attention! The alignment aids must not be insulated because otherwise the adhesive connection of the holders with the plaster will not be sufficient later. Stick the alignment aids through the respective holes. Insert a metal bar into the negative cast. Check the parallel alignment of the alignment aids again and fix them with longuettes. Close the cutting edge.

Fase 2/3

Fix the negative cast and the metal bar to prevent it from tipping over. Fill the negative cast with plaster. Afterwards, access the joint angles of the individual normal posture with e-Cast and make adjustments if necessary. Wait until the plaster has completely hardened. Remove the alignment aids and the e-Cast sensors. Remove the negative cast in order to receive the positive cast.

Fase 3/3

The square holes at knee and ankle height produced by the alignment aids are at an angle of 90 degrees to the direction of movement and parallel to each other and the ground.

Fase 1/1

The alignment of the orthosis is based on the individual, gait-related normal posture of the patient. In mid stance, this results in a gait pattern that is as physiological as possible.

Last Update: 12 October 2018


×

Tabella cookie tecnici:

Nome Scopo Durata della memorizzazione Gestore Tipo
fe_typo_user Questo cookie è un cookie di sessione standard di TYPO3; salva i dati di accesso inseriti per il login di un utente in un’area chiusa. Durata della sessione TYPO3 Association, Sihlbruggstrasse 105, 6340 Baar, Svizzera HTTP
rc::c Distingue tra esseri umani e robot Durata della sessione Google Ireland Limited, Google Building Gordon House, 4 Barrow St, Dublin, D04 E5W5, Irland HTML
×

Tabella cookie marketing:

Nome Scopo Durata della memorizzazione Gestore Tipo
_ga Registra un ID univoco per generare dati statici per l'utilizzo del sito Internet da parte dell'utente. 2 anni Google Ireland Limited, Google Building Gordon House, 4 Barrow St, Dublino, D04 E5W5, Irlanda HTTP
_gid Registra un ID univoco per generare dati statici per l'utilizzo del sito Internet da parte dell'utente. 1 giorno Google Ireland Limited, Google Building Gordon House, 4 Barrow St, Dublino, D04 E5W5, Irlanda HTTP
_gat l cookie _gat_UA contiene inoltre il numero di identificazione (_gat_ <***>) del conto di Google Analytics o del sito Internet a cui fa riferimento il cookie. 1 giorno Google Ireland Limited, Google Building Gordon House, 4 Barrow St, Dublino, D04 E5W5, Irlanda HTTP
_gcl_au È utilizzato da Google AdSense per l’efficacia pubblicitaria sui siti Internet. 3 mesi Google Ireland Limited, Google Building Gordon House, 4 Barrow St, Dublino, D04 E5W5, Irlanda HTTP
r/collect Trasmette dati mediante il dispositivo e il comportamento dell’utente su Google Analytics. Durata della sessione Google Ireland Limited, Google Building Gordon House, 4 Barrow St, Dublino, D04 E5W5, Irlanda Pixel